Thursday, 6 August 2015

Green Piggies


In April two lovely baby Guinea Pigs joined our family.  We had done a couple of stints looking after our friends Guinea Pigs, so felt ready for the commitment.  I'd had Guinea Pigs as a kid, but it would seem things have changed a lot since then!  My childhood pets were kept outside, and the poor wee things often had to swim, as we had a backyard that flooded ankle deep when it rained.  Thankfully my pet keeping practices are better informed now, thanks to the internet and friends.  I consider my Guinea Pig keeping practices to be rather friendly to both the piggies and the planet, so wanted to share them here, along with links to those from who I have gleaned this knowledge.


1.  Guinea Pigs like to live inside and have lots of space to run around.

Our piggies have the best of both worlds, with an outdoor cage for fine day 'outdoor time', where they happily munch our lawn.  This is not for the lawn-proud as it ends up with an interesting checkerboard pattern. I've also made them an enclosure under the trampoline, which is handy for keeping the grass down under there.


2.  Pet shop cages are too small but you can make your own.

You'll find endless ideas online, have a look at the links below, especially my pinterest board.  Clever people have made good sized cages out of all sorts of things, in the true sense of recycling and reusing.  Above is the C&C (cubes are coroplast/corflute) cage we made.  I have some improvements in mind for it, but it is working well as is.  You can see the old pet shop cage below it, our guest suite.

3.  Lining our cage with hay and newspaper is not for me!

When guinea pig sitting I found out how quickly our compost bin was being overwhelmed by the waste bedding material from the guinea pigs cage.  So I was thrilled to find an alternative: cloth nappy style!  As a past user of cloth nappies (diapers) I was familiar with the concepts behind using a fleece layer on top of an absorbent layer, and not squeamish about the washing side of things.  I found instructions on line and varied them a bit.  When I built the bigger cage I made new ones, and kept the old small cage as guest piggy accommodation, and for when our piggies go on holiday.  I sourced my fleece (top layer) and mattress protectors/old towels/bath mats from the local op shops so feel I've ticked the 'reuse' box of my environmental mantra of 'reduce, reuse, recycle'.


4.  Daily room service is quick and keeps smells at bay

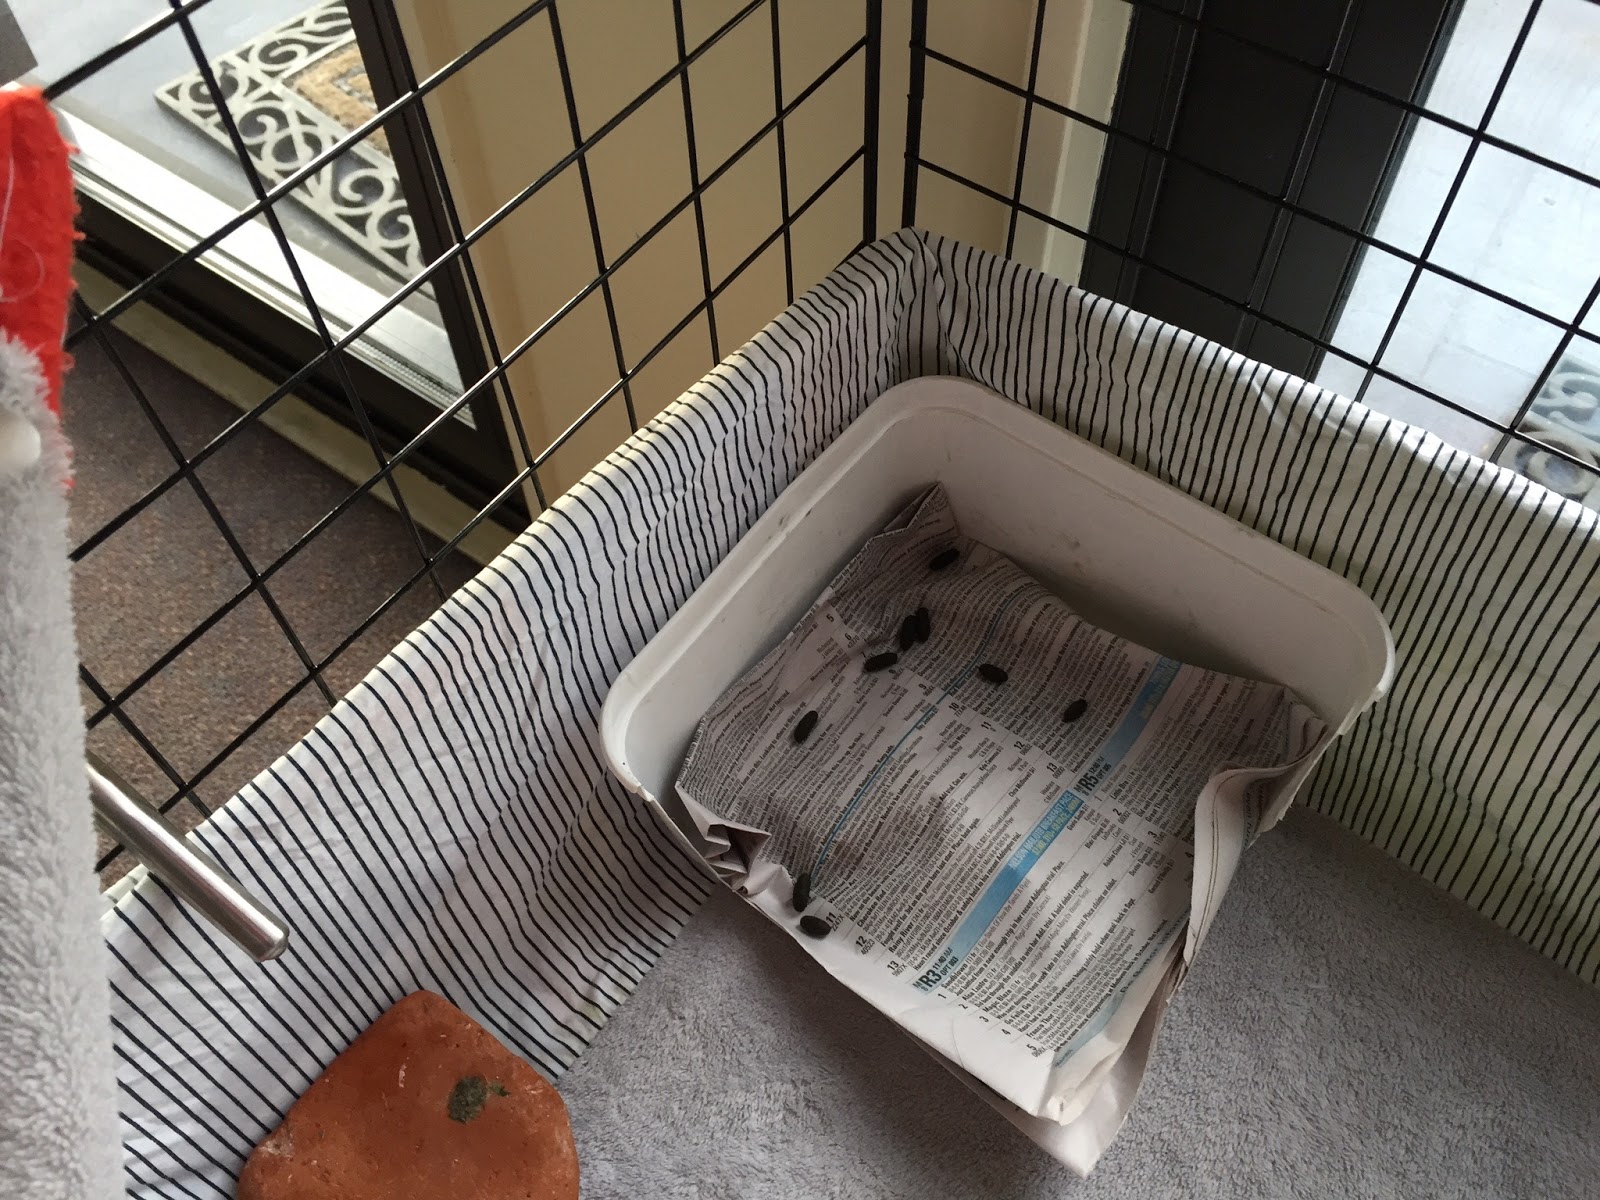
Our piggies love a fresh clean cage and reward it with lots of pop corning (that is cute little jumpy spins they do when they are excited).  Each day I try and give them some outside time, and strip the used bedding out of their cage.  I shake it into the recycle bin.  Their poos just shake off.  With some soapy water in a bucket (I just use a tiny bit of dishwashing liquid), I wash their food bowl, toilet, and hay-tray.  Then I rinse their bedding in the same water, and squeeze it out ready to go into the household washing.  For the bottom of their cage, I spray on some white vinegar and give it a quick wipe and dry.  The whole lot can be done in five minutes.  The small amount of newspaper, hay scraps, poop, etc is great for the compost and helps stop  it becoming too sludgy.  Ours mostly toilet in one corner of the cage, so they have a toilet there made of an old ice-cream container and lined with a single folded sheet of newspaper (I raid the neighbours recycling bin occasionally!).

5.  Piggies are actually friendly and interactive.

This was a big discovery for me, as I don't recall this about my childhood ones.  Probably because ours live inside with us, they are very friendly and interact with us.  They vocalise and we've learned what the different sounds mean, including purring when they are content and 'wheeking' when they want food.  When I start to prepare dinner they start wheeking for the veggie offcuts.  They will stand up  against the side of their cage, or on their hammock and call to us for attention.


6.  Piggies salad can be free!

I get our fruit and vegetables from a local saturday morning market.  I discovered the vendors put their offcuts (outer leaves, stems, too small, bruised etc) aside as rubbish to be disposed of.  They don't mind me taking a bag or two of it for my piggies.  This lasts them a week and gives them a great seasonal variety of produce.  It is their favourite by far and they call out for it at dinner time!  I also make hay and dried food available to them, as well as fruit and veggie scraps and our lawn!

So I hope that gives you some green ideas for your piggies keeping, or some inspiration if you are considering Guinea Pigs as pets.

Useful links:


Fleece bedding: http://www.calicavycollective.com/2013/10/how-fleece-bedding-works.html?m=1
http://www.calicavycollective.com/2014/03/guinea-pig-101-fleece-bedding-guide.html#more

C&C cages:
https://www.guineapigcages.com/howtometric.htm

Here is my Guinea Pig pinterest board with lots and lots of ideas on how to care for your piggies and create a fun and comfortable environment for them.


Tuesday, 7 July 2015

The Cycling Mum

I'm pretty noticeable around my local area, as I wear a high-vis vest with "mum" on it, and ride a long orange bike. Here I will answer some of the questions I am often asked.  

That is an unusual bike, did you make it?  Is it electric.
I didn’t make it.  It is a Yuba Mundo cargo or utility bike from the USA.  You can get electric ones, however my bike is chocolate-powered.  We call it ‘Rocket’.

Where did you get your bike?
Daryl, from Maungaraki imports them and sells them from a cycle store in Upper Hutt.  I found his website, cargobikesnz, on the internet when I was researching my options.

What do you use it for?
I originally got it because I was sick of pushing a buggy around! I’d been doing it for 6 years and would estimate I was covering over 1000 km a year.  That is because I prefer to use active transport, like cycling or walking, for short trips.  I didn’t expect my young children to cover the distances I was, so needed something for them that I could power.  We have also used a kiddy bike trailer, but I have found the cargo bike much easier to use and park.  My kids mostly cycle and scoot themselves now, but I still use my cargo bike and love the fact that I can put so much on it, and thus use my car even less.

Why did you choose that bike?
It has room for my youngest child plus cargo like bags, shopping, etc.  Or I can take two kids on it.  You can hear us coming when that happens, as my son gets very very excited!  It is easier to use, maneuver and park than a trailer, although we did like the trailer for safety of toddlers and adventures.

How far have you cycled?
On this bike I only really cycle around the Hutt because it is hard to manage a puncture on the rear wheel.  But on other bikes I have had many cycling adventures in NZ and overseas.  I’ve cycle toured in NZ, Australia, Slovenia, Scotland, Austria, Hungary, Slovakia, and Vietnam.  That was before kids!  With kids, we’ve done the Central Otago Rail Trail, and recently I did the Nelson Great Taste Trail on my folding bike.

Where do you cycle?
On this bike I cycle around the Hutt.  I use my bike for school runs, errands, appointments, library trips, and my market shopping.  On my own I use the road any river trail.  With kids I will often use the footpath, depending on traffic and destination.

Why do you cycle?
Because it is good for me and for the planet.  

Do you have a car?
Yes I do, but I prefer to keep it for longer trips and occasional use.  For short trips I like to use my feet or bike.  It is great not to have to bother with parking!  Plus I get fresh air, exercise and a greater sense of community.  I find it a bit sad when really little kids ask me “Don’t you have a car?”, it is like they have no concept of getting around other than driving/being driven.  

Is it safe?
I’ve certainly had my moments, but mostly it is fine.  It is important to cycle confidently and be visible.  I wish there were more cyclists and more facilities for cyclists.  Anytime a motorist gets angry, aggressive or impatient, I just wish they would vent their feelings by campaigning for more facilities for cyclists.  If they don’t want me on the road then get me a cycle path!  There is a six-times return on investment for any amount spent on cycling facilities, so we all win!

Do you cycle on the footpath?
When I am with my kids I often cycle on the footpath.  I really don’t like doing this, but must put their safety first.  I’d like to invite anyone who doesn’t like cyclists on the footpath to send a letter to the council requesting safe, connected, separated cycle paths, especially around schools, train stations and the CBD.

What would you say to anyone who wants to try cycling more often?
I’d say get the right gear and give it a go.  There are great ‘Cycle Ready’ skills courses you can do.  You have nothing to lose and so much to gain!  And if cycling doesn’t appeal, just try walking more.  It is so good for you and your whanau.  

10405419_916346181731277_6963504458817895080_n-2.jpg

Monday, 29 June 2015

Plastic Free July

Plastic free!… now that is an idea I love!  What is it? How do you do it?

“The challenge is quite simple...attempt to refuse single-use plastic during July.
Plastic Free July aims to raise awareness of the amount of single-use disposable plastic in our lives and challenges people to do something about it. You can sign up for a day, a week or the whole month and try to refuse ALL single-use plastic or try the TOP 4: plastic bags, water bottles, takeaway coffee cups and straws.
Join thousands of people from over 70 countries saying NO to single-use plastic this July.”  From: Plastic Free July.  
394432.png.jpeg
"Think about it...why would you make something that you are going to use for a few minutes out of a material that's basically going to last forever. What's up with that?"  - Jeb Berrier, BagIt movie.

So why refuse, why not just recycle?

Currently only 5-10% of the plastics produced are recycled, 50% end up in landfill and a lot of the rest ends up in our waterways and oceans.  
“Every piece of plastic ever produced still remains somewhere in the earth today. In the last half of the 20th century over 1 billion tonnes of plastic was produced. This figure has already doubled in the first ten years of this century (Scientific American).”

But how? Here are some ideas I use in my own life.


  1. Plastic Bags.  I use reusable shopping bags.  I have lots of them strategically located near my bike, near the car keys, in the car, in my bags.  I make sure I always have one with me by hanging one (which packs into it’s own little pocket) from the outside of my handbag.  That way it is ‘in sight and in mind’.  For grocery shopping I take my reusable bags with me.  For market/fresh produce shopping I take a stash of plastic fruit and vege bags with me and reuse them until they fall apart.  Once I’ve run out of those I will move to using lightweight fabric/net bags for my fruit and vege.  When I get home I unpack my fruit and vege and then put the bags back into the stash with my market basket, ready to use again.
  2. Water Bottles.  I’m tight, I don’t like to buy water.  But I do like to drink a lot of it.  Solution: strategically located reusable water bottles: in my handbag, on my bikes, in the car, in my gym bag, in the kids lunchboxes, etc.
  3. Takeaway coffee cups.  Drink mindfully! - try and make your coffee break a real break, sit in the cafe, take time to enjoy your coffee from a reusable cup.  If you have to grab and run, keep your own travel cup in the car (a stash of them if need be; you can nearly always find them at the salvos.  Many of them are thermal and will keep your hot drink warm too!  If you end up with disposable cups, then use them for planting seedlings ready for your spring garden.
  4. Straws.  Yes these are fun, and my kids will tell you everything tastes better with a straw.  So here is how to kill two birds with one stone.  Get those reusable shaped crazy novelty straws.  Tell your kids the only way to keep them clean and healthy for reuse is to only drink water from them.  Voila, no plastic straw waste and kids are drinking the best drink of all!
  5. ClingWrap, Food packets, Zip Lock Bags.  These often lurk in lunchboxes, then blow around the playground, then get washed down the drain, into the stream, then into the ocean.  But at least your kids get lunch treats that you missed out on right?  And you save at least two whole minutes every morning.  Yes, rant rant, I hate food in little packets, and next to that I hate glad wrap and plastic bags.  There is a whole world of ideas out there to help you achieve a rubbish free lunch box.  And whilst you are at it, you could knock a fair bit of sugar and salt out of their diets too.  Next year obesity is set to overtake smoking as the nation's biggest health problem.  Don’t set your kids up for a life of weight watching; get them used to healthy eating now!  Remember it was party/treat food for a reason - because it is lovely to have sometimes!  Check out this post for ideas.  And Eastern Hutt Schools EnviroKids have some great observations and suggestions also:

images-14.jpeg

So whether it is islands of plastic trash in our oceans visible from space, beautiful sea creatures tangled in and poisoned by plastic, concern for renewable resources, or your own health concerns; you have plenty of reasons to nudge your comfort zone, stretch your convenience muscles and power up your positivity and try out a plastic free July.  And hopefully you will form a fabulous new habit or five!

And here is a school holiday idea: Grab some buckets or sacks and head for your local beach, park or riverbank.  Pick up us much rubbish as you can: maybe make it a race of contest with prizes.  Talk about where the rubbish comes from.  

Wednesday, 17 June 2015

Good with money? Money skills for kids

A friend recently told me of her frustration that her parents had not prepared her for handing her money as an adult.  “They figured I already knew about money so they thought they were doing the right thing just buying me everything”.  From her perspective, she was set up for failure as she never learned how to manage money, and she wishes her parents had taken a different approach.  I grew up as the child of a beneficiary, who was very good at making the benefit stretch so we usually had what we needed.  There were definitely tough times, and I missed out compared to my peers, however I learned to work for what I wanted, and a lot about managing money!  I want my kids to understand the value of money, the importance of working, earning and saving, and importantly not to take it for granted.  I want them to be ‘good with money’.


I don’t believe we do our kids any favours by taking the approach of making up for what we missed out on, or by trying to keep up with others.  I love the saying that we should indulge our kids with our time, but not with things/money.  Is it a vicious circle that we are short of time so buy happiness, but are short of time because we need the money to buy things to make us feel happier?  Affluenza?  So, how do we raise kids who will be good with money?  Here are some ideas:

  1. Be generous with your time. Save gifts for birthdays and Christmas.  You might be in the position that you can afford to buy your child toys and other things they want any time.  However is getting what they want whenever they want it a reasonable expectation for a child to have?  How will than pan out when they are financially independent?  Or will it mean that they won’t be financially independent (and/or in debt) because they cannot wait to have whatever it is they desire this week?  When people reminisce about happy childhood memories it usually involves special time spent together rather than consumption.  
  2. Encourage them to save for the things they want.  My daughter loves ‘My Little Pony’ and desperately wanted more of the toys.  She didn’t want to wait until her birthday or Christmas, so she decided to save for what she wanted.
  3. Teach them the value of shopping round and buying second hand.  We compared the prices of new toys and ones on Trade Me.  She quickly decided for herself that she would get much more for her money buying second hand.  She has also become adept at rummaging in op shops to find treasures to add to her herd.
  4. Encourage them to earn.  Develop a family approach to pocket money that you can all agree to.  Some families have chart systems where pocket money is paid according to chores completed.  We split ours into ‘save’ & ‘fun’, with ‘save’ going into the child’s bank account and ‘fun’ into their wallets.  Other families use the categories ‘save’, ‘spend’ and ‘share’.  ‘Share’ is for gifts and charity giving.
  5. Teach them the value of money by using comparisons.  e.g. “that toy costs the same as the groceries to feed our family for a week”, or “you can get three of these for the price of one of those”.
  6. Be a role model.  Talk about your money choices: things you want but don’t get because you have other priorities; things you are saving for; how you save for family holidays; why you shop around to save money; why you choose to shop at the supermarket rather than the dairy; how much it costs to fill up the car.  Of course you are not trying to create stress or guilt for your child, but instead trying to help them see you making responsible choices.
  7. Give them the opportunity to manage a budget.  It could be as simple as the budget for a day out at the school fair; or more responsibility with managing their clothing budget for a year.  A friend with a mixture of primary, intermediate and secondary aged kids gave them each their clothing budget for the year to manage.  The fashion conscious teens and tweens soon learned that if they blew the majority of their budget on designer jeans they would be shopping at the op shop for the rest of the year.  The primary aged kid spent the minimum in budget shops and sales and saved the rest to use as spending money on the family’s holiday!  The key to giving kids a budget to manage is the lesson that ‘when it is gone it is gone’, so no bailing them out (unless you want to teach them about interest and debt!).

Here are some excellent resources if you want more ideas or information:


Great ideas in the NZ Herald:

Podcast from Radio New Zealand National

Tuesday, 2 December 2014

Lake Taupo Cycle Challenge - I did it!!!

With much pride and satisfaction I report that I completed the Lake Taupo Cycle Challenge on Saturday 29 November 2014.  As a first timer he is some info about my approach on the day and what I learned.

Approach: My goal was to finish and feel good.  This meant I trained lots so that I would be physically and mentally ready for an endurance event.  But I didn't go hard out on the day or focus on a completion time.  On finishing I felt really great, which means I probably could have gone faster/harder but that was not my goal!  I approached it like this:
1.  I chose a suitable start group.  The woman's W2 start group was great for me, friendly and not crowded.
2.  I rode at my own pace, and kept in mind the advice to treat the first 80 km as a warm up.  This stopped me from going like the clappers and running out of steam.
3.  I took some brief breaks.  More than I did in training actually.
4.  I took plenty of food and ate and drank per my nutrition plan.
5.  I made an effort to chat with those around me, encouraging others, having a bit of a joke and being friendly.
6.  I expected the weather to be a mixed bag/unpredictable.  It was, and that was okay.

Main thing I learned.  The thing I had worried most about was bunch riding and being crowded.  By starting in a back of the pack start group, the vibe was really relaxed, I had plenty of space and bunch riding was purely optional.  I found myself with the same riders over time, although that changed if I took a break.  I found I was faster up hill, and then overtaken on the downhills.  So for my time goals and start group, bunch riding was purely optional.  The cycle skills on the course were mixed, so it definitely pays to have your wits about you and be comfortable with bunch riding and etiquette, but it is certainly not necessary to be a bunch expert.

Things I would do differently next time.
1.  Peak Fuel carb drink was supposed to be available at most aid stops, so I only took 500 ml of it in one bottle and water in my other.  However they ran out of it at most of the stops where I wanted to refill it, so I was left with water as my only option.  So next time I am not so sure if I will be loyal to the sponsor Peak Fuel, and will probably go for another product and carry enough to make up for the entire 160 km.  Poor sponsorship really.
2.  I might go harder now I know what to expect
3.  I would put some non cycling shoes in my drop bag to change into at the end.
4.  I would win the spa!!!!!! (if only!)

The event is well organised, the drop bag system works well, and overall the whole thing is an amazing feat of logistic management.  Well done to the organisers!

Tuesday, 18 November 2014

Taupo cycle challenge FAQ

Here are some questions I am frequently asked about my training for the Lake Taupo cycle challenge (LTCC).

1.  How many hours a week do you train?
This has varied because I am following a training plan, where the volume and intensity of my training increases over a 3-4 week period, followed by a recovery week, and then back to increasing.... And so forth.  But for example, in week 10 of my program I trained for 10 hours on the bike or RPM; add to that three non-bike gym sessions of between 30 mins and 2 hours.  Many would not bother with the gym sessions, but I needed to balance out my training with core and stretch work, and did not want to lose the gains I have made in strength training by giving it up altogether.

2.  Where did your training plan come from / have you got a coach?
I don't have a coach.  My training plan initially came from the LTCC website.  I then borrowed the book Taupo 101 by Matt Oliver from the library and pretty much adopted his beginners program with some variations.  I also referred to some other books to understand more about how I could effectively tweak the program to suit me, e.g. it was okay to split a longer ride into two rides on the same day, etc.

3.  Why are you doing it?
In 2008 heard about the challenge and thought it sounded good, so gamely stated that one day  I would do it.  What I didn't know was a) how long it was and b) how hilly it was.  When I discovered those two things my resolve faltered - I didn't know how I would be able to build back up to that level of fitness (as I had been before kids).  Allowing myself the space to train once my youngest started school took care of the time to train aspect, and I also allowed myself plenty  of time to build my fitness back up.  My husband has been unfailing in his conviction that I can and should do it, and his support of that goal.  I am so lucky!

4.  How long does it take you to cycle 160 km?
Good question! I don't know because I've never done it.  I know some people can do it in 4-5 hours but I am not one of those.  I know I can do 140 km in 6 hours moving time.  So my goal for Taupo is 7 hours.  More if I get a puncture or any other problem.

5.  Where do you ride?
It has been great fun finding training routes and discovering how close I live to lovely farm and bush land, great coastal roads and challenging hills.  You can see where I ride on strava.

6.  Who do you ride with?
I mostly ride on my own because I train mid week, during the schoolday, and don't know any other rider as lucky to have that opportunity.  I have also practiced group riding with a great group called 'The Hub' who ride from Petone fountain each Saturday morning.  

7.  What do you do for water/toilets/food whilst riding?
I carry two 750 ml bottles, one with carb-mix and another with water.  On a ride more than 4 hours I usually need to refill my water and go to the toilet.  Usually one facility will do for both.  If only water is needed, school bubblers can be handy (on weekends).

8.  How many weeks have you trained for?
I have a 12 week training program, but started early so I would have a week up my sleeve for illness or injury.  So it has been 13 weeks.  However prior to that I worked systematically tracking my cycling volume and adding to it as needed in order to build up a 'base' I could build on.  I did not want to risk injury by launching into week 1 of a training program if it was too big a leap from what my body was used to.

Thursday, 30 October 2014

Cycle Training: Should Have, Could Have, Would Have....

Isn't hindsight an amazing thing.  So in that vain here are some quick hindsight learnings from my training for the Lake Taupo Cycle Challenge.  The context here is that I am up to week 9 of my training and the body is starting to present a few niggles!

1.  Bike Fit
My road riding bike is a flat bar road bike, purchased about ten years ago.  It has had a great deal of 'time off' whilst I did my baby producing and rearing bit.  I did have it well fitted to me when I bought it, so figured I would not need to take the precaution of having a professional bike fit prior to starting serious training.  What I did not factor in was: 1.  Woman's bodies change with babies (e.g. my feet are a full size bigger), 2.  My husband had borrowed my bike and altered a few things, 3.  There was a different saddle added somewhere along the way.
Hindsight: If you bike or you have changed, go for a proper bike fit.

2.  Cycling shoes
My beloved ten year old, much travelled, cycling shoes were showing signs of age and wear.  I boldly denied the need for new ones, applied some glue and generally ignored reality.  The result: shoes literally falling apart 20 km into a 120 km training ride!  Some electrical tape got me through the ride, and I had  them repaired, but there was no denying the need for new shoes.  Being tight, I bought some on sale, and was assured they would stretch.   So far, not so good.
Hindsight: Buy the shoes that best fit your feet when needed.  Get repairs done professionally before they become urgent.

3.  Muscle balance assessment
As a regular gym goer whose training is broad and includes both strength and flexibility workouts, I figured I would be okay not not need a muscle balance assessment by a physiotherapist.  My current niggles would suggest otherwise.
Hindsight: if you are over 40 and/or have had previous injuries, prevention is better than cure.  Get an assessment done prior to the training season so you can work on any potential problem areas before they become real problems.

Tuesday, 14 October 2014

Some great training rides around Lower Hutt

All my previous cycle training was done around the northern reaches of Sydney.  I was fortunate to belong to the very active 'Bike North' bicycle user group, whose rides enabled me to learn great places to ride and ride with a lovely bunch of people.  Fast forward to living in Lower Hutt, New Zealand.... after years of parenting taking priority over riding time, I had no idea where to ride for longer training rides.  Here are the results of some exploration, along with approximate distances.  For more detailed route information you can check me out on Strava.

1.  Round the bays - 75 km return
Cycling from Lower Hutt toward the city, around Oriental Bay, out to Scorching Bay, through the pass of Banda to Happy Valley Road, back into the city and out to the Hutt again.  A fairly flat route, great for a longer easy ride.  Very scenic.

2.  Moonshine Hill, various distances, starting at 30 km return
This was a celebrated find!  Cycle from Lower Hutt up  SH2, turning off at Haywards.  Cycle up to Moonshine Road turn off on right.  Long steady upward climb of around 6 km.  Then choose whether to descend to Riverstone Terraces and return via SH2 or descend, climb back up the steeper side back the way you came.  Sometimes I like to cycle up SH2 to Riverstone Terraces turn-off and do some hill repeats on the steeper side, which gives you a meaty 3km odd climb.  A beautiful scenic route.  The road is narrow, so not sure how it would be with weekend traffic.

3.  Blue Mountains, various distances with Te Marua route clocking in at 75 km return.
Head up to Silverstream, either via SH2 or Western Hutt road.  At Silverstream follow signs for Blue Mountains.  A lovely big climb takes you to Whitemans Valley road.  From there you can do a shorter route returning either via Wallaceville Hill or Mangaroa Hill, or the full route via Mangaroa to Te Marua, where you can head back to the Hutt via SH2.  I have also completed this one as a 107 km circuit.  On the first loop headed back to the Blue Mountains for a second climb after turning back at Te Marua, then made the second circuit smaller by turning back via Wallaceville hill.

4.  Akatawara, Waikanae, Haywards, 107 km loop
Head up SH2 to Akatawara turn off.  Enjoy a lovely rolling climb to the summit.  A glorious descent to Waikanae.  A fast ride along SH1 to the Paekakariki turn off, a great climb to a amazing view at the top.  A rolling descent to Pauatanui, then more climbing to return to the Hutt via the Haywards.  A great work out!

5.  Hill Repeats - a 2.5 km 7% climb to repeat to your hearts content
From Normandale Road turn off to end of Poto Rd gives you a great 2.5 km 7% climb to practice hill repeats on.  There is other lovely riding up there too, with Sweetacres drive and Belmont Hill Road to enjoy.  A great change from the valley floor and easy to access.

Wednesday, 8 October 2014

Learning Curve and Other Hills

The Lake Taupo Cycle Challenge is a hilly 160 km.  It is a bigger days cycling than I've done before, and will be busy, with 10,000 odd cyclists participating in a variety of events.  As such I figured I needed to not only train, but also do my homework.  Here is some things I have learned so far:

1.  Nutrition

I eat pretty healthy, but not for 'performance'.  On long rides in the past, I've drunk water and casually munched various muesli bars or whatever food is available along the way. Scotland meant oat cakes and tablet (like fudge, yum); in Vietnam it was noodle in beef broth and long necks of beer (along with some mysterious packaged things we called 'roadfill' because of its texture!); in France it was bread and cheese.  Get the picture?  So after seeing various  info about personalised nutrition plans, etc etc I figured I had better get informed.  What I learned, in a nutshell is that when you  are out riding hard for more than an hour or so, you  need a plan for eating and drinking right from the start.  That will ensure performance, recovery, best possible training outcome and avoid the dreaded bonk (which I think in me manifests itself in a lower form known as extreme grumpiness!!!!)   I follow the this formula:

After 15 mins drink water (sips)
After 30 mins drink carb mix (powdered sports drink made up with water)
After 45 mins have a bite (literally!) of food to eat plus some water
then alternate, every 15 mins, between drinking carb mix and bite of food and water.

This seems to work pretty well.  It is advisable to find out what carb mix will be available at aid stations on the day and try it out ahead of time.

Another useful piece of  advise is about refuelling after the ride.  For best recovery, which helps consolidate the training, consume at least 50 gm carbs within 30 mins post exercise.  This is a stop gap to having a good square meal with plenty of carbs.  Consuming carbs within 4 hours of exercise apparently has lots of beneficial effects - which you can read more about in this article.

2.  Recovery, graduation and intervals

A good training plan allows time for recovery, both active recovery and full rest.  A plan may include increased training over a period of 3 - 4 weeks, and then a rest week with a much much lighter training schedule.  Each training week should incorporate 1 -2 rest days.  Week over week increases, measured in distance or time, should not exceed 10% else there is risk of over training.  I am following a 12 week training plan suggested in the book Taupo 101 (Matt Oliver), aimed at beginners.  I've adjusted it a bit for my own purposes.

3.  Group riding

Cycling with my kids is sort of good preparation for cycling in a bunch.  In that I tend to be very very aware of what the rider in front of me might do and expect the unexpected.  On the downside, cycling with kids has taught me to hang back and allow a decent following space so I can avoid their somewhat erratic manoeuvres!  Given I've not done real bunch riding before, I am really stepping outside my comfort zone to try and learn this skill.  I seem to have found a lovely bunch of riders tolerant to a beginner such as myself, so I look forward to learning and improving in this area and will share any tips I might learn as I go.

4.  I love hills

I think I knew this one already, but it has been way fun to be reminded of it.  I make up assorts of natty hill climbing songs, often based on kids songs, to keep me occupied as I make my way up up up!!!

Sunday, 28 September 2014

Training for the Challenge - a plan

I'm entered in the solo category of the Lake Taupo Cycle challenge (see tab), so am training for a 160 km ride with plenty of hills.  Bearing in mind my cycling has been pretty much confined to trips to the shops and around town for 8 years, I knew I would need a good plan.  I also needed to ensure my ramp up was gradual enough to avoid knee problems I had experienced in the past.  As an avid gym go-er, and active transport enthusiast, I had a good base level of fitness to build from.  But could I build up to 160 km?

I started by figuring out what my base weekly cycling added up to in kilometres.  I then devised a plan figuring out where I would get to if I added 10-20% to that each week.  I also factored in the training information given on the Lake Taupo Challenge website.  Time available to train was another big consideration. However my daughter was due to start school in mid August, and the challenge is end November, so I knew I would have some extra training time available.  Putting all of that together helped me be confident that I could put in the training required, so I booked our Taupo accommodation and made a note to enter the challenge on the day entries opened in July!

My plan has evolved... I read a few books on the topic and have taken the plan from the book "Taupo 101" and adjusted it to factor in the Les Mills RPM sessions I do each week.  It is a 12 week plan, but I started training prior to that, enabling me to build up my base slowly and ensure I had time to adapt.  I'm also doing plenty of cross training at the gym, as I want to ensure my body is well balanced, with plenty of core strength and flexibility work, as well as working the parts of my body that get less of a work out with cycling.

So I am now in Week 5, which is a recovery week.  Probably why I have time and energy to be writing this.  Training on the bike affords lots of good thinking time, and I often think of things I would like to write, or people I would like to contact.  Perhaps I need some dictation device!  Last week I did 10 hours 21 minutes riding.  Actually a bit more than planned, but I wanted to join a group ride on Saturday to practice my bunch skills which are practically non-existent.  Thankfully cycling with kids has made me a vary aware rider, the downside is it has taught me to hang back a bit more than is best in bunch riding.  My typical training week includes a couple of Les Mills RPM sessions, a hill training session of two hours or more, and a long ride, four hours or more, with plenty of hills.  I also do a strength session at the gym, one or more core training sessions and a couple of yoga/pilates classes to balance it out.

Two weeks ago I completed my first 100 km ride since I became pregnant with my son more than 8 years ago!  It was so exciting to be out there doing that kind of distance.  It felt good.  Yes I was super tired afterward, and it is a whole different deal to come home to family duties as opposed to the no-kids life of coming home and flopping on the sofa!

Monday, 5 May 2014

Green Kids

'Caring for our environment' is one of our family values.  Like many values it is learnt via how we live rather than taught. However a lot can be imparted by how we answer questions and explain choices. The concept of choice is an important one, namely we choose options that are better for the planet even if they are not the easiest or the same as what everyone else is doing.

Some ideas of choices your family could make:

  • Use scrap paper for drawing and writing. Using the other side of discarded non confidential work papers or mail works well. 
  • Teach kids to look after their toys to a prevent breakages going to landfill. 
  • Focus on fewer, quality toys rather than cheap junk which breaks or are grown out of quickly. 
  • Join a toy library. 
  • Watch less tv. This encourages your kids to be more imaginative and better at 'making their own fun' with whatever is available to them. 
  • Choose to walk, cycle or take public transport. Explain why. 
  • Grow veggies
  • Compost or worm farm
  • Recycle
  • Pick up rubbish
  • Observe the effects of pollution on waterways and our neighbourhoods and environment
  • Choose your local school
  • Enjoy wearing and giving away hand me downs
What other ideas can you think of?


These holidays we got a lot of cardboard boxes from the supermarket.  First the kids made towers, cubbies, and walls out of them.  Later my son and I hot glued some into a robot.


Thursday, 27 March 2014

Rocket Week 4 - 27 km

A lighter week with 27 km accomplished.  We are both still very much enjoying using Rocket.

I choose to ride on the footpath when my daughter is aboard as it feels safer, particularly on congested or busy routes.  However it does have some drawbacks.

1.  It is illegal.  New Zealand has antiquated laws in this regard:

NZ law from NZTA website, "You can only ride on the footpath if you're delivering newspapers, mail or leaflets". Or expanded version from their code for cyclists: "You are only allowed to cycle on the footpath if you are:delivering newspapers or mail, or
you are riding a small wheeled recreational device that has a wheel diameter of less than 355 millimetres (typically tricycles or small children's bicycles)."
I believe the NZ law is outdated in this regard, and we need to campaign for revision more along the lines of NSW in Australia. Although there is debate about whether it is safer or not in the footpath, I believe parents who would absolutely not allow their children to cycle on the road would be okay with the footpath, and parents should be permitted to accompany their children on the footpath.  Drivers would adapt and become more vigilant about footpath users including cyclists if they become used to seeing more if them. Local laws should ensure cars exiting driveways have clear views of the footpath. 
NSW cyclist law: "you can
Ride on the footpath if less than 12 years old
Ride on the footpath if you are an adult riding with, and supervising, an under 12 year old
Ride on the footpath if you are carrying a person under 10 years old as a passenger on your bicycle or in or on a bicycle trailer you are towing - not a pedicab"

Although it seems unlikely I would be booked for riding on the footpath, I am a law abiding person and don't like being on the wrong side of it.  However it is a legal battle I may relish if it bought much needed change to this antiquated law.

2.  I am quiet and surprise other footpath users.
I feel rude ringing my bell at people.  If I ring from too far away they don't hear it, and if I ring to close I scare them.  Often trees and other obstacles prevent me from going on the berm to pass.  My bell isn't friendly sounding and is poorly placed for ease of access.  I am experimenting with a sequence of jingly bells dangling from my handlebars designed to gently announce my presence but I will have to work on that as I don't think the current ones are loud enough (they are old cat collar ones, more suited to keeping cats away from birds!).   Any suggestions from fellow cyclists are most welcomed!

Thursday, 20 March 2014

Rocket Week 3: 40 km

Another first for Rocket this week - two passengers.  I removed the basket and put the second cushion back on, enabling me to transport my son to Keas along with my daughter.  My son was overcome with excitement and shouted at passers by 'Look we are on a tandem for three people'.  He is resistant to my explanations that Rocket is not a tandem!  It was certainly a fitness challenge carrying them both, and it got my heart rate up.

Other Rocket highlights of the week:

I've noticed my pannier hooks nicely to side of shopping trolley when getting a few things from Supermarket.  This is because it is adjusted for the wide diameter tubing of Rockets intreated rear rack.

Attention: Many people ask about Rocket: "did I have it custom built", "wish I'd had one", "where did you get it?", "that is so cool", "what an awesome bike".  We even had a passing car beep and give us the thumbs up out the window.  A nice change from the usual type of motorist reaction to a cyclist!

An alternative name:  My friend, upon seeing Rocket, recited a wonderful phrase from Julia Donaldson's children's book 'Room on the Broom':
"Then out rose ... A TRULY MAGNIFICENT BROOM! With seats for the witch and the cat and the dog, A nest for the bird and a shower for the frog. "Yes!" cried the witch, and they all clambered on. The witch tapped the broomstick and whoosh! they were gone."(DONALDSON, SCHEFFLER, 2002)

Thursday, 13 March 2014

Rocket week 2 : decked out

Rocket Week 2: 33 km, and looking good!

Last week we did 33 km, using Rocket for a full week including some errands.

'Running Boards'

Daryl of Cargo Bikes NZ, who sold us Rocket, provides laser cut Marine Ply protective panels for the sides of the rear rack and the bottom parts of the rack.  I call these the 'running boards'.  I have sealed them with a marine grade varnish to protect them and enhance their durability.  Because I may be hanging panniers from the top of the board I have reinforced/protected it with some plastic edging from the hardware shop, and covered this with decorative duct tape (my daughter chose the design).  On the lower boards I have added non-slip adhesive tape, as I was concerned the gloss finish of the varnish would become slippery when wet, and this is where my daughter places her feet whilst mounting and dismounting, as well as riding, on Rocket. 
Left: The running boards are installed, with some decorative and functional improvements
Right: Wings added to Hi-Vis vest. 

Safety

I have purchased a high-vis vest for my daughter and added hi-vis fairy wings to it.  She loves it and usually doesn't want to take it off when we get to our destination.  The wings were made out of an op-shop visibility vest (cost $1.40) and some reflective piping (cost $4).  I was going to velcro them on but ended up just sewing them on instead.  My own hi-vis vest came courtesy of NZTA and their 'See the Person, Share the Road' campaign.  It says 'Mum' on the back and people keep asking where I got it!  I have also added a safety flag to Rocket.  Come winter I will add some lighting.

A spare flag added to the rear with help of some plastic tubing and cable ties.

Fun

For fun I've added a bike bell to my daughters handle bars, along with a homemade basket-bag that used to hang on her balance bike.  (It is made out of the leg of an old pair of jeans, with her initial appliquéd on it, and some fancy wool stitched on as a fringe, it is attached using cable ties through button holes).  We've taken some soft toy passengers in the rear basket, and my daughter is getting good at stowing whatever she wants to take in either the pannier or the basket.
A bell and basket-bag for my passenger

Thursday, 6 March 2014

A new way to get around: Rocket Week One


Before my first child was born he owned his first cycle helmet.  And so began our next phase of active transport, family style.  I will do a post on our historic efforts, but this one focuses on our latest  move forward, our new Yuba Mundo Cargo/Utility Bike!

The Decision
After seven years of extensive buggy use my feet and I had had enough.  I was looking for alternatives that would not turn my four year old into an olympic speed walker.  We cover 20 - 30 km a week - a lot to ask from little legs, either on foot or bike.   Our Wee-Hoo is great for adventures, but not so great for around town.  I'd spied kids perched on cargo bikes and found out more.  The Yuba Mundo seemed the go, and living on the flat, we opted not to get an electric version.  After looking out for a second hand one for ages, I drained my savings and bought a brand spanking new bright orange Yuba Mundo.  Yippee.

The Waiting
Good things come to those who wait, and it seemed a long week between ordering and receiving our new wheels.  However the wait gave us time to ponder names, and how we would personalise our ride.

The Arrival
The Yuba Mundo arrived Friday night and was named Rocket.  Rocket had marine ply laser cut side panels that needed to be sealed, so that was the first job.  Not being keen to wait on that long process, I cut temporary panels out of a cardboard shop display and attached them instead.  Colourful!

Two rear cushions, and handlebars for the front passenger.
In our first week, and incomplete week of use (pending temporary panels), we did 23 km.
The maiden voyage to school and pre-school, using elastics to secure the bag to the utility deck.
Spot the 'Estee Lauder' side panels!
Improvised lower attaching point for pannier

The 'Pimp your ride' plan
Attaching a pannier and basket
I set to work deciding how best to add features that would enable us to carry school bags, shopping, etc.  I've attached a basket using an old belt, and improvised a lower attaching point for a pannier.  I also set to designing a name sticker that can be attached to the completed side panels.


Yet another coat of marine grade varnish on the panels.


Sunday, 9 February 2014

Clean Teeth for Kids

The kids dental clinic (aka Dental Nurses) recommend that we brush our kids teeth for them until they or six or so.  I see an irony here, as their precious adult teeth are arriving at the same time they have to come to grips with their own dental hygiene.  Yikes.  So here is how we manage the joys of teeth brushing time in our house.

1.  Keep 'em handy.  We have toothbrushes and paste for the kids in both the upstairs and downstairs bathrooms.  In the evening teeth are brushed during bath/shower time.  In the morning we do it in the kitchen where we eat breakfast, straight after breakfast.

2.  Use Technology.  We find some of the toothbrush timer apps are fun, and you can also buy a little Barnabee timer on-line (picture and link below).  This helps make the two minutes pretty clear for all concerned.  For my older son, we use the kitchen timer whilst he stands at the sink - no arguments over how long as it is digitally dictated!

Apps:

Maclean's Nurdle, Free Apple or Android App.
This little guy does a song and dance with instructions on how to brush.
Just ignore the bit about rinsing as it goes against current recommendations.

https://itunes.apple.com/nz/app/macleans-nurdle-time-nz/id528168742?mt=8

Barnabee also does a song and dance and is rather cute.  My daughter objected to him on moral grounds as he almost uses a word for bottom that rhymes with gum.
You can play his song online, so we just bookmarked the page rather than buying the app.  We did buy the little timer and it was popular with my son for a while.

http://shop.beehealthy.org.nz


3.  Use games.  I like the one where you pretend to be a Zoo keeper and need to brush the Lion's (or Crocodiles, or Hippos etc) teeth!  You'll find lots of other great ideas on the web too, especially imaginative games you can play with preschoolers for toothbrush co-operation.  We do these ones in the evening for my daughter.  For my son we often brush his teeth in the evening to ensure they get at least one good clean a day.

How do you manage tooth brushing for kids in your house?


Monday, 3 February 2014

School Book Covering

It is that time of year again - back to school.  A lovely bundle of fresh stationary represents all the possibilities and excitement that a new school year offers.  I must admit to having a bit of a thing for stationery!

One  thing I am not so keen on is the process of covering the school exercise books.  The adhesive book cover stuff and I do NOT get along.  In the course of covering the book I end up with myself, and possibly my cup of tea attached to the stuff, not to mention the air bubbles, toast crumbs and hair that sneak in as well.  It sticks to the scissors and just does not end up looking nice.  It kind of spoils the new book look!

And then at the end of the year, or whenever you get to it…. that clear stuff makes the books hard to recycle, and face it, that is where a lot of them will end up, sooner or later.  I've no doubt the emotional attachment to pages of alphabet, blend and math practice will wear off.  Story writing is another thing altogether, those we keep!

So how excited was I when I read of an alternative!  Re-useable book covers!  Oh yeah, bring it on!  I used them last year and can happily report that:

  • They lasted the year
  • They were easy to put on and remove
  • We will be able to reuse them (size dependant)
  • They are handy to switching to a new book later in the year
  • My son liked them
They have patterned, coloured and clear ones.  I quite like the clear ones as they are easily reusable from son to daughter, whereas the patterned ones seem to have gender focused designs.  We personalise the books by making on the computer a 'bookplate' which includes my son's name, class, and some favourite pictures.  We paste this onto the exercise book, and then put the clear cover on top.  Easy peasy lemon sneezy!

I've seen them at Warehouse Staionary (or was it Officeworks?) but I buy mine from ezcover.co.nz, they are quick and good value.